Making A Simple Game
Posted July 25th, 2019
A common approach to solving big problems is splitting them into smaller problems.
In this post I intend to show how a game can be split into multiple small problems. Hopefully this will help programmers without much experience in game development get started.
In this tutorial I will create a simple game, based on the game fishy.
I'll be using javascript to make it, but the same principles apply to other languages and platforms.
The Rules:
- Move around with the keyboard.
- Don't collide with bigger circles or it's game over.
- Eat smaller circles to get bigger.
Table Of Contents
- Setup
- Game Loops
- Keyboard Input
- Adding Enemies
- Collision Detection
- Using The Delta Time
- Saving Scores
- A Little Code Organisation
Setup
Let's start with making a html file. Save this as index.html.
<!DOCTYPE html>
<html>
	<head>
		<title>Fishy</title>
	</head>
	<body>
	<canvas width="720" height="480" id="canvas">

	</canvas>

	<style type="text/css">
		canvas {
			border: thin solid black;
		}
	</style>

	</body>
</html>
Just a canvas to render to.
Now for some javascript:
var canvas = document.getElementById("canvas");
var ctx = canvas.getContext("2d");
ctx.fillStyle = "red";
ctx.fillRect(100, 100, 100, 100);
Save this as fishy.js, then load the script from within the html:
<script src="fishy.js">Running this should display a canvas with a red square:

Let's make that a red circle:
ctx.fillCircle = function(x, y, radius) {
	ctx.beginPath();
	ctx.arc(x, y, radius, 0, Math.PI*2, false);
	ctx.fill();
}


ctx.fillStyle = "red";
ctx.fillCircle(100, 100, 50);
Game Loops
We now have a red circle, but how do we get it to move?
In every game, there is something called a game loop.
At its core, we need to update the state of the game and render it to the screen every frame. Some game loops even check for events, we will be using event listeners.
Sometimes it is abstracted away by the platform.
In some platforms a simple while loop is enough, but, because we are writing this game on the browser, we can't use a simple loop. We also can't call setInterval and expect a smooth game.
Fortunately the window has requestAnimationFrame, that is called whenever the next frame is ready to be rerendered.
The details of how animation frames work are specific to javascript, so I'll gloss over that. The important thing is that every frame makes a call to update and draw.
var canvas = document.getElementById("canvas");
var ctx = canvas.getContext("2d");

var start = 0;


function gameLoop(timestamp) {
	var delta = (timestamp - start);
	update(delta);
 	draw(ctx);
 	start = timestamp;
 	window.requestAnimationFrame(gameLoop);
}

function update(delta) {
	console.log(delta);
}

function draw(ctx) {
	ctx.fillStyle = "red";
	ctx.fillCircle(100, 100, 50);
}

window.requestAnimationFrame(gameLoop);


ctx.fillCircle = function(x, y, radius) {
	ctx.beginPath();
	ctx.arc(x, y, radius, 0, Math.PI*2, false);
	ctx.fill();
}
The delta time is often used for sprite animations and to result in a consistent experience on different speeds.
To make the player move, let's make the position a variable and increment it every frame.
function update(delta) {
	x++;
}
This works, but it leaves a trail:
That's because I don't clear the screen before rendering the circle, and render the circle multiple times. Using clearRect before every frame fixes this.
function draw(ctx) {
	ctx.clearRect(0, 0, canvas.width, canvas.height);
	ctx.fillStyle = "red";
	ctx.fillCircle(x, 100, 50);
}
Keyboard Input
As mentioned previously, I'll be using event listeners to handle keyboard input in this tutorial, but there are other ways of handling input. One way is polling for events in the update function.
For this game we will change the velocity of the player on keyboard input. Pressing on certain buttons should cause the player to move, and the player should stop moving once those buttons are no longer pressed. Holding those buttons means the player will keep moving.
To do this we need to define a velocity and speed variable. The reason for doing this is that speed will have an asolute value, whereas the velocity can be in any direction.
var x = 40, xVel = 0, speed = 2;Then we adjust the position of the player by the velocity.
function update(delta) {
	x += xVel;
}
And now we set the velocity according to what button was pressed. If the left or right arrow is pressed, then the player moves, and when they are no longer pressed the player stops moving horizontally.
var ctx = canvas.getContext("2d");

document.addEventListener("keyup",
	event => {
		if (event.key == "ArrowLeft" || event.key == "ArrowRight") {
			xVel = 0;
		}
	}
);

document.addEventListener("keydown",
	event => {
		if (event.key == "ArrowLeft") xVel = -speed;
		if (event.key == "ArrowRight") xVel = speed;
	}
);
Let's also add a vertical velocity:
function update(delta) {
	x += xVel;
	y += yVel;
}
And repeat the keyboard input for this vertical velocity.
document.addEventListener("keyup",
	event => {
		if (event.key == "ArrowLeft" || event.key == "ArrowRight") {
			xVel = 0;
		}
		if (event.key == "ArrowUp" || event.key == "ArrowDown" ) {
			yVel = 0;
		}
	}
);

document.addEventListener("keydown",
	event => {
		if (event.key == "ArrowLeft") xVel = -speed;
		if (event.key == "ArrowRight") xVel = speed;
		if (event.key == "ArrowUp") yVel = -speed;
		if (event.key == "ArrowDown") yVel = speed;
	}
);
var x = 40, y = 40, xVel = 0, yVel = 0, speed = 2;Adding Enemies
The player moves correctly, but we also want to have enemies. These enemies will have a lot in common with the player. To make it easier, I'll move the position, velocity, speed, and update code to a class, so we can instantiate a player object.
I'll make a circle class. This takes in a position, radius, speed, and colour. It also initialises the velocity, so that it can update the position, and it renders a circle to the screen with the correct position and radius.
class Circle {
	constructor(x, y, radius, speed, colour) {
		this.x = x;
		this.y = y;
		this.radius = radius;

		this.xVel = 0;
		this.yVel = 0;
		this.speed = speed;
		this.colour = colour;
	}

	update(delta) {
		this.x += this.xVel;
		this.y += this.yVel;
	}

	draw(ctx) {
		ctx.fillCircle(this.x, this.y, this.radius);
	}
}
Save this as Circle.js
<script type="text/javascript" src="javascript/Circle.js"></script>
<script type="text/javascript" src="javascript/fishy.js"></script>
Replace the intialisation code with this in fishy.js.
var player = new Circle(40, 40, 7, 5, 'red');And replace the update and draw functions with this:
function update(delta) {
	player.update(delta);
}

function draw(ctx) {
	ctx.clearRect(0, 0, canvas.width, canvas.height);
	player.draw(ctx);
}
This requires modifying the event handling to refer to the player instance.
document.addEventListener("keyup",
	event => {
		if (event.key == "ArrowLeft" || event.key == "ArrowRight") {
			player.xVel = 0;
		}
		if (event.key == "ArrowUp" || event.key == "ArrowDown" ) {
			player.yVel = 0;
		}
	}
);

document.addEventListener("keydown",
	event => {
		if (event.key == "ArrowLeft") player.xVel = -player.speed;
		if (event.key == "ArrowRight") player.xVel = player.speed;
		if (event.key == "ArrowUp") player.yVel = -player.speed;
		if (event.key == "ArrowDown") player.yVel = player.speed;
	}
);
Player and Enemy will both be subclasses of circle.
class Player extends Circle {
	constructor(ctx) {
		super(ctx.width/2, ctx.height/2, 7, 5, 'red');
	}

	update(delta, ctx) {
		if (this.y < 0) {
			this.y = 0;
		} else if (this.y > ctx.height) {
			this.y = ctx.height;
		}
		if (this.x < 0) {
			this.x = ctx.width;
		} else if (this.x > ctx.width) {
			this.x = 0;
		}
		super.update(delta);
	}
}
var player = new Player(ctx);function update(delta) {
player.update(delta, ctx);
}var ctx = canvas.getContext("2d");
ctx.width = canvas.width;
ctx.height = canvas.height;Enemy class:
class Enemy extends Circle {
constructor(ctx, colours) {
var radius = Math.round(Math.random()*(canvas.height/5))+1;
var y = Math.random() * ctx.height;
var speed = 1;
var colour = colours[Math.floor(Math.random() * colours.length)];
var x = -radius;
if (Math.random() * 100 > 50) {
x = ctx.width + radius;
}
super(x, y, radius, speed, colour);
this.xVel = x < 0 ? speed : -speed;
this.distanceTraveled = 0;
}
update(delta) {
super.update(delta);
this.distanceTravelled += this.speed;
}
}var colours = ['blue', 'green', 'yellow', 'black'];var player = new Player(ctxzx);
var enemy = new Enemy(ctx, colours);function update(delta) {
player.update(delta, ctx);
enemy.update(delta);
}
function draw(ctx) {
ctx.clearRect(0, 0, ctx.width, ctx.height);
enemy.draw(ctx);
player.draw(ctx);
}Enemies arraylist
var enemies = [];
for (var i = 0; i < 6; i++) {
enemies.push(new Enemy(ctx, colours));
}function update(delta) {
player.update(delta, ctx);
for (var enemy of enemies) {
enemy.update(delta);
if (enemy.distanceTravelled > canvas.width + 2 * enemy.radius) {
enemies.splice(enemies.indexOf(enemy), 1);
enemies.push(new Enemy(ctx, colours));
}
}
}
function draw(ctx) {
ctx.clearRect(0, 0, ctx.width, ctx.height);
for (var enemy of enemies) {
enemy.draw(ctx);
}
player.draw(ctx);
}

Collision Detection
How do we determine if two circles are colliding, given their positions and radii?
If we have the positions of the centres then we can calculate the x and y distance by subtracting. From this, using pythagoras, we can calculate the actual distance:
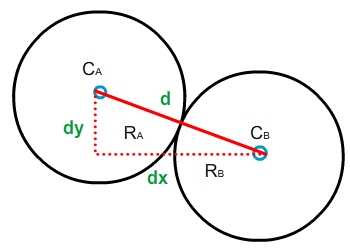
If the distance between the centre is less than or equal to the sum of the radii then the circles are colliding.
isColliding(other) {
return (this.x-other.x)**2 + (this.y-other.y)**2 < (this.radius+other.radius)**2;
}It is common in game engines to not bother square rooting to obtain the actual distance, since square rooting is computationally expensive and unneccesary to determine if two circles are colliding.
enemy.update(delta);
if (player.isColliding(enemy)) {
if (enemy.radius < player.radius) {
player.radius += enemy.radius > 10 ? enemy.radius/10 : 1;
enemies.splice(enemies.indexOf(enemy), 1);
enemies.push(new Enemy(ctx, colours));
}
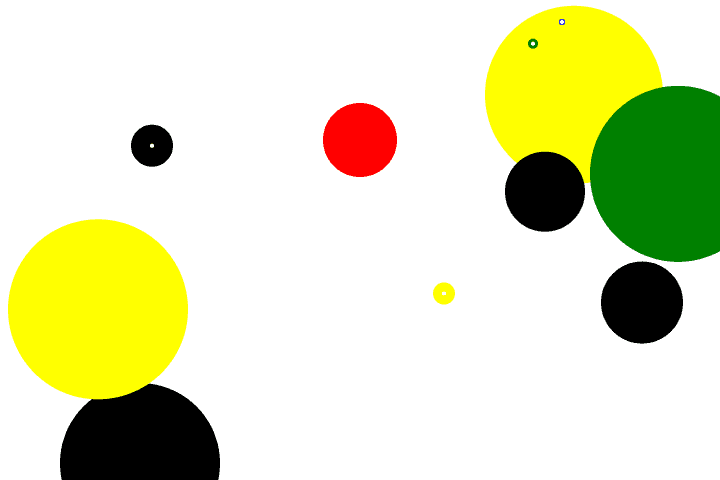
}If a player is colliding with a smaller enemy, then we increase the radius of the circle and remove the enemy, then create another.
To indicate which enemies are edible, I'll display a small white circle in the centre of smaller circles.
enemy.draw(ctx);
if (player.radius > enemy.radius) {
ctx.fillStyle = "white";
ctx.fillCircle(enemy.x, enemy.y, 2);
}
State Machine
The core mechanics of the game are more or less complete. But there is more to a game then the core mechanics. Most games have some sort of menu system. They can be paused. They can have multiple levels.
A game has multiple states. Each of these states is updated differently, renders differently to the screen, and handles input differently. They can also navigate to each other.
This is good use case of a state machine.
I want to add a paused and game over state. To do this I will have a state manager for the game. I will make all the fields and methods static so that there is only one intance of it accessible anywhere in the game.
class GamePageManager {
static update(delta) {
if (GamePageManager.currentPage)
GamePageManager.currentPage.update(delta);
}
static draw(ctx) {
if (GamePageManager.currentPage)
GamePageManager.currentPage.draw(ctx);
}
static handleKeyDown(keycode) {
if (GamePageManager.currentPage)
GamePageManager.currentPage.handleKeyDown(keycode);
}
static handleKeyUp(keycode) {
if (GamePageManager.currentPage)
GamePageManager.currentPage.handleKeyUp(keycode);
}
static addPage(name, page) {
GamePageManager.gamePages[name] = page;
}
static setPage(name) {
GamePageManager.lastPage = GamePageManager.currentPage;
GamePageManager.currentPage = GamePageManager.gamePages[name];
}
static setPageFromStart(name) {
setPage(name);
GamePageManager.currentPage.init();
}
}
GamePageManager.gamePages = [];Save using the class name as the file name, as is the convention here.
This requires an actual game page that can be initialised, updated, rendered, and capable of handling input.
class GamePage {
init() {
}
update(delta) {
}
draw(ctx) {
}
handleKeyDown(keycode) {
}
handleKeyUp(keycode) {
}
}Now most of the code in fishy.js can move to MainGame.js
class MainGame extends GamePage {
constructor(ctx) {
super();
this.ctx = ctx;
this.colours = ['blue', 'green', 'yellow', 'black'];
}
init() {
this.player = new Player(ctx);
this.enemies = [];
for (var i = 0; i < 6; i++) {
this.enemies.push(new Enemy(ctx, this.colours));
}
}
update(delta) {
this.player.update(delta, this.ctx);
for (var enemy of this.enemies) {
enemy.update(delta);
if (this.player.isColliding(enemy)) {
if (enemy.radius < this.player.radius) {
this.player.radius += enemy.radius > 10 ? enemy.radius/10 : 1;
this.enemies.splice(this.enemies.indexOf(enemy), 1);
this.enemies.push(new Enemy(ctx, this.colours));
}
}
if (enemy.distanceTravelled > canvas.width + 2 * enemy.radius) {
this.enemies.splice(this.enemies.indexOf(enemy), 1);
this.enemies.push(new Enemy(ctx, this.colours));
}
}
}
draw(ctx) {
ctx.clearRect(0, 0, ctx.width, ctx.height);
for (var enemy of this.enemies) {
enemy.draw(ctx);
if (this.player.radius > enemy.radius) {
ctx.fillStyle = "white";
ctx.fillCircle(enemy.x, enemy.y, 2);
}
}
this.player.draw(ctx);
}
handleKeyDown(keycode) {
if (keycode == "ArrowLeft") this.player.xVel = -this.player.speed;
if (keycode == "ArrowRight") this.player.xVel = this.player.speed;
if (keycode == "ArrowUp") this.player.yVel = -this.player.speed;
if (keycode == "ArrowDown") this.player.yVel = this.player.speed;
}
handleKeyUp(keycode) {
if (keycode == "ArrowLeft" || keycode == "ArrowRight") {
this.player.xVel = 0;
}
if (keycode == "ArrowUp" || keycode == "ArrowDown" ) {
this.player.yVel = 0;
}
}
}
Now fishy.js is much more streamlined.
document.addEventListener("keyup",
event => GamePageManager.handleKeyUp(event.key)
);
document.addEventListener("keydown",
event => GamePageManager.handleKeyDown(event.key)
);
var start = 0;
GamePageManager.addPage("MainGame", new MainGame(ctx));
GamePageManager.setPageFromStart("MainGame");function update(delta) {
GamePageManager.update(delta);
}
function draw(ctx) {
GamePageManager.draw(ctx);
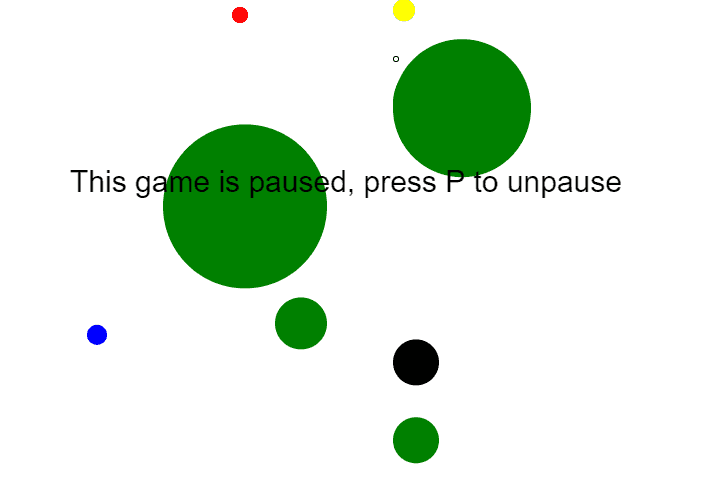
}To enable pausing we simply create a new page for it.
class PausePage extends GamePage {
draw(ctx) {
GamePageManager.lastPage.draw(ctx);
ctx.fillStyle = "black";
ctx.font = "30px Arial";
ctx.fillText("This game is paused, press P to unpause", 70, ctx.height/2.5);
}
handleKeyUp(keycode) {
if (keycode == "p") GamePageManager.currentPage = GamePageManager.lastPage;
}
}And navigate to it when 'p' is pressed in MainGame.
handleKeyUp(keycode) {
if (keycode == "ArrowLeft" || keycode == "ArrowRight") {
this.player.xVel = 0;
}
if (keycode == "ArrowUp" || keycode == "ArrowDown" ) {
this.player.yVel = 0;
}
if (keycode == "p") {
GamePageManager.setPage("PausePage");
}
}We also need to add an instance of it to the game page mangager.
GamePageManager.addPage("MainGame", new MainGame(ctx));
GamePageManager.addPage("PausePage", new PausePage());
GamePageManager.setPageFromStart("MainGame");<script type="text/javascript" src="javascript/PausePage.js"></script>
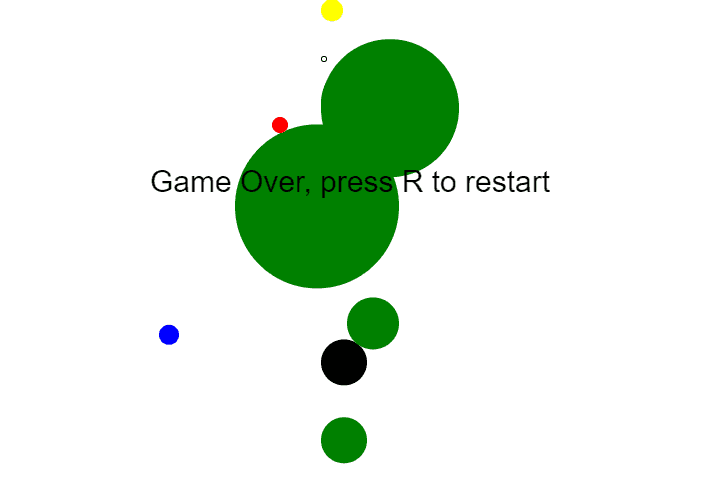
Handling game over is similar, except we navigate to it when the player collides with a larger circle, and reinitialse the main game on restart.
class GameOverPage extends GamePage {
draw(ctx) {
GamePageManager.lastPage.draw(ctx);
ctx.fillStyle = "black";
ctx.font = "30px Arial";
ctx.fillText("Game Over, press R to restart", 150, ctx.height/2.5);
}
handleKeyUp(keycode) {
if (keycode == "r") GamePageManager.setPageFromStart("MainGame");
}
}<script type="text/javascript" src="javascript/GameOverPage.js"></script>GamePageManager.addPage("GameOverPage", new GameOverPage());if (this.player.isColliding(enemy)) {
if (enemy.radius < this.player.radius) {
this.player.radius += enemy.radius > 10 ? enemy.radius/10 : 1;
this.enemies.splice(this.enemies.indexOf(enemy), 1);
this.enemies.push(new Enemy(ctx, this.colours));
} else {
GamePageManager.setPage("GameOverPage");
}
}
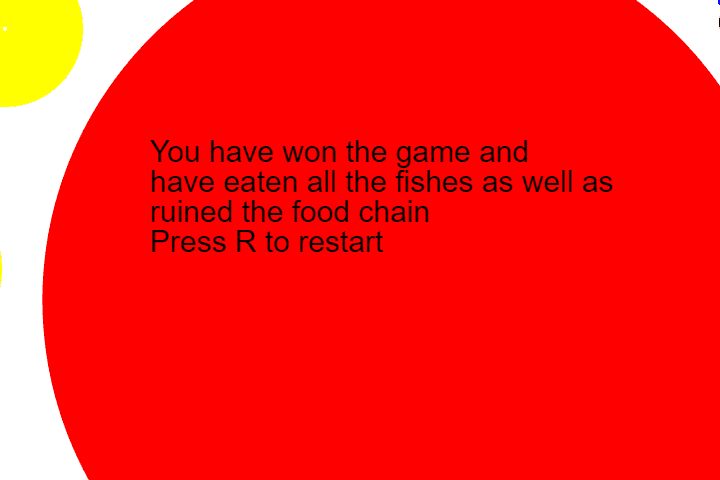
If you've followed along with the code, you may have noticed something interesting in the game. At the beginning progress is slow becase we grow by a fraction of the size of the circles that we eat, and we start of small. But if you eat enough circles growth becomes much faster. It doesn't take long to fill up the entire screen, making the game unplayable.
If we reach that stage we should navigate to a page congratulating us for our victory.
class VictoryPage extends GamePage {
draw(ctx) {
GamePageManager.lastPage.draw(ctx);
ctx.fillStyle = "black";
ctx.font = "30px Arial";
ctx.fillText("You have won the game and", 150, ctx.height/2.5 - 30);
ctx.fillText("have eaten all the fishes as well as", 150, ctx.height/2.5);
ctx.fillText("ruined the food chain", 150, ctx.height/2.5 + 30)
ctx.fillText("Press R to restart", 150, ctx.height/2.5 + 60);
}
handleKeyUp(keycode) {
if (keycode == "r") GamePageManager.setPageFromStart("MainGame");
}
}GamePageManager.addPage("MainGame", new MainGame(ctx));
GamePageManager.addPage("PausePage", new PausePage());
GamePageManager.addPage("GameOverPage", new GameOverPage());
GamePageManager.addPage("VictoryPage", new VictoryPage());
GamePageManager.setPageFromStart("MainGame");<script type="text/javascript" src="javascript/VictoryPage.js"></script>update(delta) {
this.player.update(delta, this.ctx);
if (this.player.radius > this.ctx.width/2) {
GamePageManager.setPage("VictoryPage");
}
Using The Delta Time
Earlier I mentioned that the delta time is often used to provide a consistent gameplay experience, but I haven't used it. Let's modify the circle class to use the delta time when updating the position:
update(delta, ctx) {
this.x += this.xVel * delta/16;
this.y += this.yVel * delta/16;
}We are assuming that 60FPS is the default. This should make the movement very smooth on very fast machines, but allow slower machines to move the player at the same speed.
Note that this could lead to issues with complex physics - e.g a bullet passing through an object before it can detect collision. However, it shouldn't be an issue for this game.
Saving Scores
To save scores, we need to calculate the score first. Let's do this by increasing the score by the radius of the enemy that the player eats.
First initialise score to zero in the MainGame class:
init() {
this.player = new Player(ctx);
this.enemies = [];
for (var i = 0; i < 6; i++) {
this.enemies.push(new Enemy(ctx, this.colours));
}
this.score = 0;
}Then increment it in the update method:
if (this.player.isColliding(enemy)) {
if (enemy.radius < this.player.radius) {
this.player.radius += enemy.radius > 10 ? enemy.radius/10 : 1;
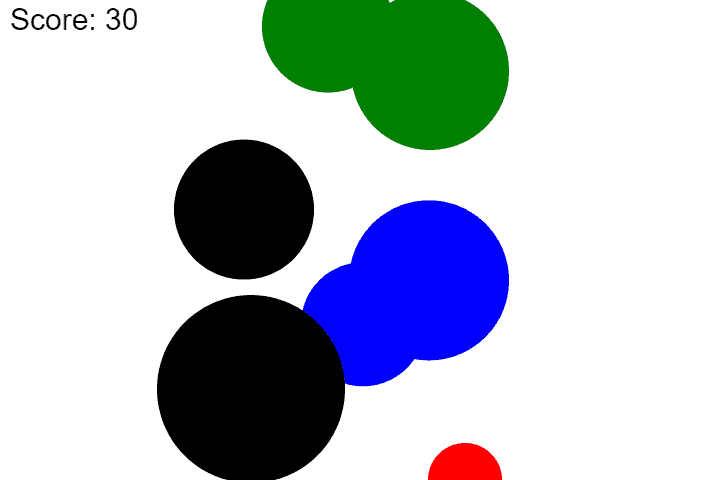
this.score += enemy.radius;Now we can render it after the player and enemies so that it is at the front.
this.player.draw(ctx);
ctx.fillStyle = "black";
ctx.font = "30px Arial";
ctx.fillText(`Score: ${this.score}`, 10, 30);
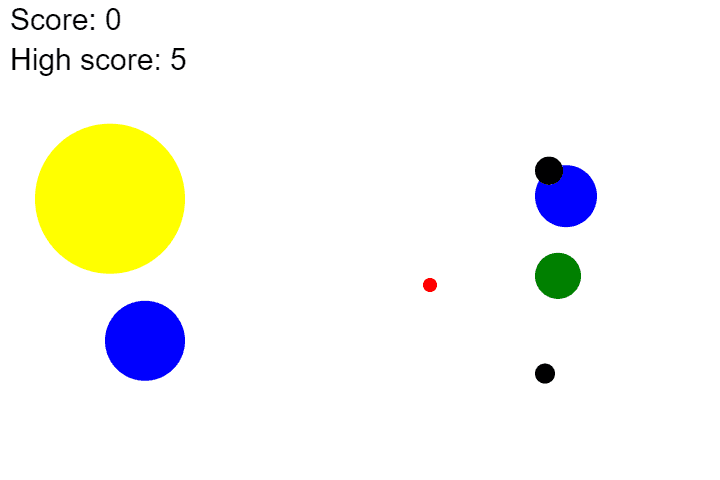
To load save scores we'll be using localStorage:
this.score = 0;
this.highscore = localStorage.getItem("fishy-highscore");
if (!this.highscore) this.highscore = 0;else {
if (this.score > this.highscore) {
localStorage.setItem("fishy-highscore", this.score);
}
GamePageManager.setPage("GameOverPage");Now to render:
ctx.fillText(`Score: ${this.score}`, 10, 30);
ctx.fillText(`High score: ${this.highscore}`, 10, 70);
A Little Code Organisation
All the code written so far falls under two categories:
- Code that is specific to this game.
- Code that applies to any game.
If we want to reuse some code in future games then it's worth seperating the code specific to this game from the code we can use in any game.
Let's create a core folder inside the javascript folder. And then let's move GamePage.js and GamePageManager.js there. Make sure to update the paths to them accordingly in the html.
All that remains is fishy.js.
Most of the code in there is useful for any game. But some of it is specific to this one. Let's split it into two files. Anything that is useful for any game goes into core/Game.js:
document.addEventListener("keyup",
event => GamePageManager.handleKeyUp(event.key)
);
document.addEventListener("keydown",
event => GamePageManager.handleKeyDown(event.key)
);
var start = 0;
function gameLoop(timestamp) {
var delta = (timestamp - start);
update(delta);
draw(ctx);
start = timestamp;
window.requestAnimationFrame(gameLoop);
}
function update(delta) {
GamePageManager.update(delta);
}
function draw(ctx) {
GamePageManager.draw(ctx);
}
window.requestAnimationFrame(gameLoop);
Leaving fishy.js with just:
var canvas = document.getElementById("canvas");
var ctx = canvas.getContext("2d");
ctx.width = canvas.width;
ctx.height = canvas.height;
ctx.fillCircle = function(x, y, radius) {
ctx.beginPath();
ctx.arc(x, y, radius, 0, Math.PI*2, false);
ctx.fill();
}
GamePageManager.addPage("MainGame", new MainGame(ctx));
GamePageManager.addPage("PausePage", new PausePage());
GamePageManager.addPage("GameOverPage", new GameOverPage());
GamePageManager.addPage("VictoryPage", new VictoryPage());
GamePageManager.setPageFromStart("MainGame");
We also have to include that other file from within the HTML:
<script type="text/javascript" src="javascript/core/Game.js"></script>Where to take this
That's it, that's enough to create a working game. But there are many ways it can be extended.
- Images instead of circles.
- A home screen with instructions.
- Mouse / touch input.
- Sound effects.
- Multiplayer (I first recreated before hearing about agar.io)
A good way to cement what you've learned is to see if you can modify this game by adding cool new features. You can also try creating new games using the code I've moved to core.